> ## Documentation Index
> Fetch the complete documentation index at: https://docs.perplexity.ai/llms.txt
> Use this file to discover all available pages before exploring further.
# Signing In to the API Portal
> Sign in to the Perplexity API Portal with Google, Apple, single sign-on, or a passwordless email code.
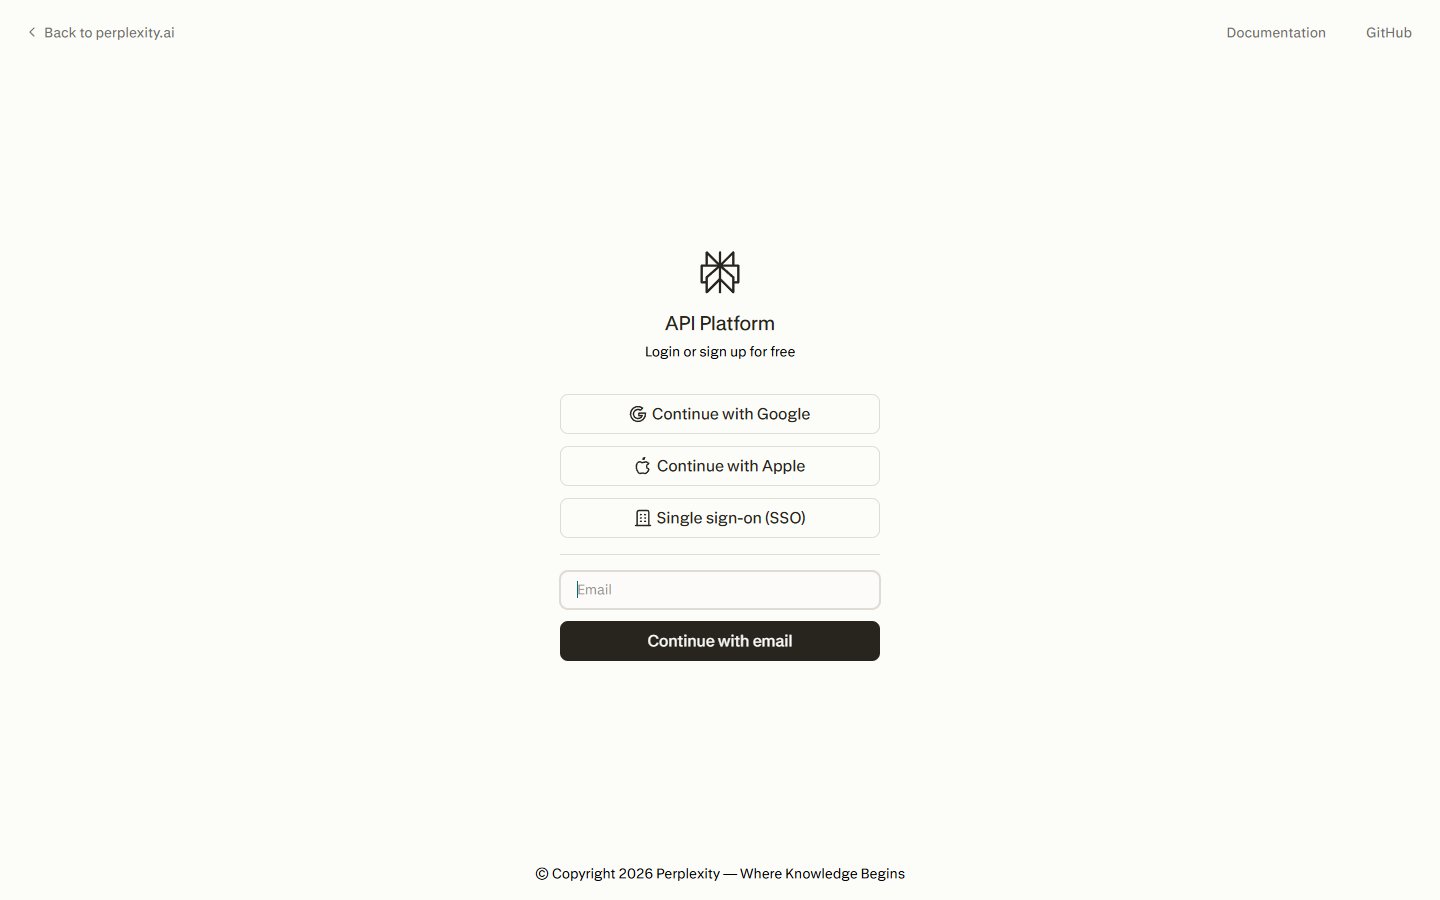
The [API Portal](https://console.perplexity.ai) offers four ways to sign in. All four create or reuse the same Perplexity account — you do not need to pick one at sign-up and stick with it.
 ## Choosing a Sign-In Option
| Option | Best for |
| ------------------------ | -------------------------------------------------------------------------- |
| **Continue with Google** | Individuals and teams using a Google Workspace or personal Google account. |
| **Continue with Apple** | Individuals who prefer Sign in with Apple, including Hide My Email. |
| **Single sign-on (SSO)** | Members of a Perplexity organization with SSO configured on their domain. |
| **Continue with email** | Anyone — sends a passwordless magic link and one-time code to your inbox. |
Signing in creates a Perplexity account, but it does not create an API project on its own. After your first sign-in, the setup wizard prompts you to create or join an API group before you can generate a key. See [API Groups & Billing](/docs/getting-started/api-groups).
***
## Continue With Google
Use Google to sign in with any Google or Google Workspace account.
On the login page, click **Continue with Google** and choose the Google account you want to use.
Google asks you to confirm the sign-in and share your name, email, and profile picture with Perplexity. Approve to continue.
You are returned to the API Portal signed in. If this is your first visit, the setup wizard walks you through creating an API group.
If you already have a Perplexity account with the same email address, signing in with Google connects Google to that existing account — you keep your API groups, keys, and history.
***
## Continue With Apple
Use Sign in with Apple, including the Hide My Email relay address.
On the login page, click **Continue with Apple** and authenticate with Face ID, Touch ID, or your Apple ID password.
Apple lets you share your real email or use **Hide My Email** to generate a private relay address. Perplexity uses whichever address Apple returns.
You are returned to the API Portal signed in. If this is your first visit, the setup wizard walks you through creating an API group.
If you already have a Perplexity account under your real email and later choose **Hide My Email**, Apple returns a different address and creates a separate account. Pick one email preference and stick with it, or contact [api@perplexity.ai](mailto:api@perplexity.ai) if you need accounts merged.
***
## Single Sign-On (SSO)
SSO lets your organization sign in through your own identity provider (Okta, Azure AD, Google Workspace SAML, and other SAML or OIDC IdPs). It works for organizations that have set up SSO on a verified domain.
SSO is available to admins of **Perplexity organizations with an active organization subscription** (paid or eligible trial). SSO is not available on personal Pro or Max plans, and it cannot be enabled with API-only billing — your organization must exist as a Perplexity organization in the main Perplexity app first. If your team doesn't have a Perplexity organization yet, [talk to Sales](https://www.perplexity.ai/enterprise/contact-sales).
### Signing In With SSO
On the login page, click **Single sign-on (SSO)**. The form switches to a work-email prompt.
## Choosing a Sign-In Option
| Option | Best for |
| ------------------------ | -------------------------------------------------------------------------- |
| **Continue with Google** | Individuals and teams using a Google Workspace or personal Google account. |
| **Continue with Apple** | Individuals who prefer Sign in with Apple, including Hide My Email. |
| **Single sign-on (SSO)** | Members of a Perplexity organization with SSO configured on their domain. |
| **Continue with email** | Anyone — sends a passwordless magic link and one-time code to your inbox. |
Signing in creates a Perplexity account, but it does not create an API project on its own. After your first sign-in, the setup wizard prompts you to create or join an API group before you can generate a key. See [API Groups & Billing](/docs/getting-started/api-groups).
***
## Continue With Google
Use Google to sign in with any Google or Google Workspace account.
On the login page, click **Continue with Google** and choose the Google account you want to use.
Google asks you to confirm the sign-in and share your name, email, and profile picture with Perplexity. Approve to continue.
You are returned to the API Portal signed in. If this is your first visit, the setup wizard walks you through creating an API group.
If you already have a Perplexity account with the same email address, signing in with Google connects Google to that existing account — you keep your API groups, keys, and history.
***
## Continue With Apple
Use Sign in with Apple, including the Hide My Email relay address.
On the login page, click **Continue with Apple** and authenticate with Face ID, Touch ID, or your Apple ID password.
Apple lets you share your real email or use **Hide My Email** to generate a private relay address. Perplexity uses whichever address Apple returns.
You are returned to the API Portal signed in. If this is your first visit, the setup wizard walks you through creating an API group.
If you already have a Perplexity account under your real email and later choose **Hide My Email**, Apple returns a different address and creates a separate account. Pick one email preference and stick with it, or contact [api@perplexity.ai](mailto:api@perplexity.ai) if you need accounts merged.
***
## Single Sign-On (SSO)
SSO lets your organization sign in through your own identity provider (Okta, Azure AD, Google Workspace SAML, and other SAML or OIDC IdPs). It works for organizations that have set up SSO on a verified domain.
SSO is available to admins of **Perplexity organizations with an active organization subscription** (paid or eligible trial). SSO is not available on personal Pro or Max plans, and it cannot be enabled with API-only billing — your organization must exist as a Perplexity organization in the main Perplexity app first. If your team doesn't have a Perplexity organization yet, [talk to Sales](https://www.perplexity.ai/enterprise/contact-sales).
### Signing In With SSO
On the login page, click **Single sign-on (SSO)**. The form switches to a work-email prompt.
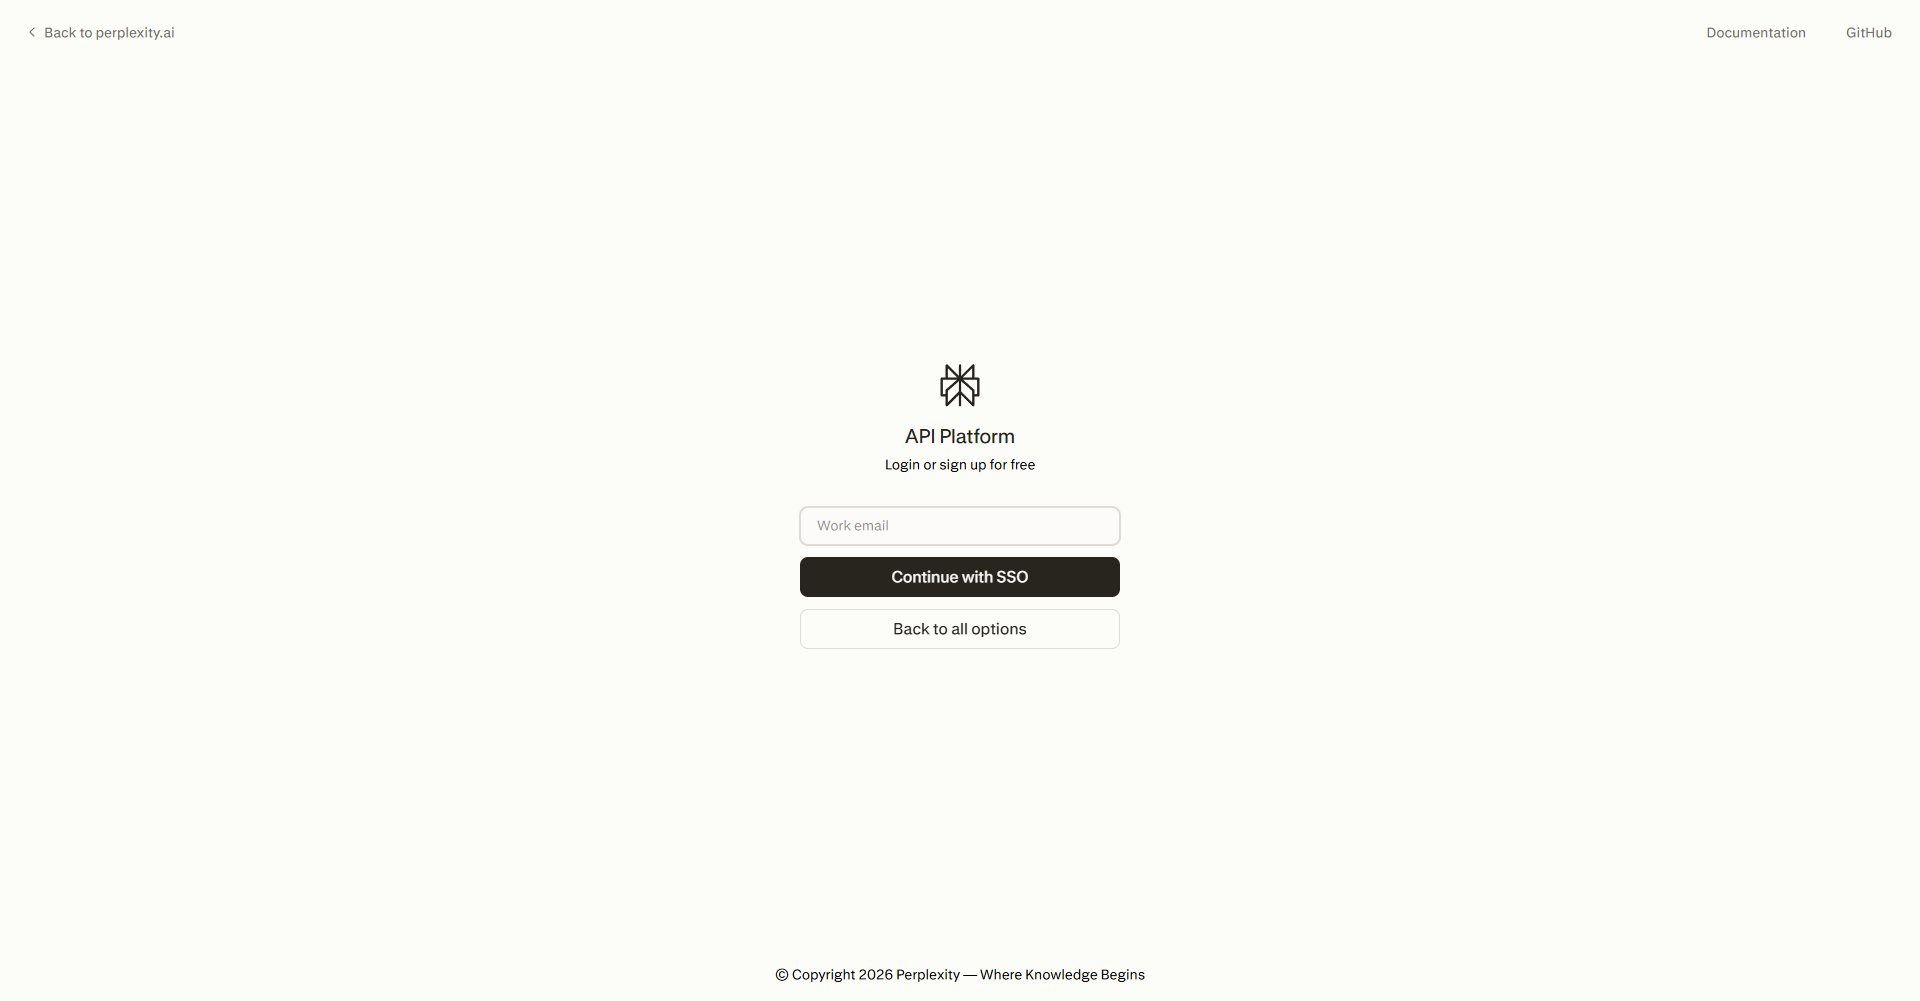 Enter the email address on your organization's verified domain and click **Continue with SSO**. Use **Back to all options** if you need to return to the other sign-in methods.
You are redirected to your organization's identity provider. Complete the sign-in there — including any MFA prompts — and you are returned to the API Portal.
If you see **"SSO is not available for this email address"**, SSO has not been configured for your domain yet. Ask your organization admin to complete the setup steps below, or use one of the other sign-in options.
### Configuring SSO for Your Organization
SSO is configured once in your organization's Perplexity organization settings — not in the API Portal — and applies to sign-in across Perplexity, including the API Portal.
For more help setting up SSO on Perplexity Enterprise, visit the [Single Sign-On collection in the Perplexity Help Center](https://www.perplexity.ai/help-center/en/collections/16665790-single-sign-on).
Your organization must have an **active organization subscription** in the main Perplexity app. An active trial qualifies. If billing is not set up yet, the settings page shows **"Complete payment to begin setup"** instead of the enable button. There is no minimum seat count for SSO itself.
As an organization admin, go to [**Settings → Identity**](https://www.perplexity.ai/account/org/identity) in the main Perplexity app. You need the **Admin** role on the organization.
Add and verify at least one domain (for example, `yourcompany.com`) that your team uses for email. Verification is done through a DNS record.
Click **Begin setup** and follow the self-serve portal to connect your IdP. The portal supports SAML 2.0 and OIDC connections and walks you through your specific IdP. For more help, visit the [Single Sign-On collection in the Perplexity Help Center](https://www.perplexity.ai/help-center/en/collections/16665790-single-sign-on).
Make sure your organization has **API access** enabled so your SSO users can reach the API Portal after signing in. If members can sign in via SSO but cannot open the Portal, ask your org admin or [Sales](https://www.perplexity.ai/enterprise/contact-sales) to turn on API access for the organization.
Once the IdP is active, you can enable **SSO required** on any verified domain. When required, everyone signing in from that domain — including Google, Apple, and email attempts — is routed through your IdP.
Need help with SSO setup or want us to walk through it with you? Reach out to your Perplexity account team.
***
## Continue With Email
Email sign-in is passwordless. There is no password to set or remember.
Enter your email in the **Email** field and click **Continue with email**.
You receive an email with both a **magic link** and a **temporary sign-in code**. Use whichever is more convenient — clicking the link on the same device signs you in immediately, and the code works on any device.
Once verified, you are signed in. If this is your first visit, the setup wizard walks you through creating an API group.
If your email address is on a domain with **SSO required**, the email flow routes you to your organization's identity provider instead of sending a code.
***
## Switching Between Sign-In Methods
You can use different sign-in methods at different times with the same account. If you first signed up with email and later click **Continue with Google** using the same address, Google is linked to your existing Perplexity account — your API groups, keys, and billing stay in place. The same applies to Apple and to switching back to email.
Account linking is based on your **email address**. Signing in with a different email — for example, a personal Google address vs. your work email — creates a separate account with its own API groups and keys. If you end up with two accounts by accident, contact [api@perplexity.ai](mailto:api@perplexity.ai).
***
## Next Steps
Create your organization's workspace, add billing, and invite teammates.
Generate and manage keys once your API group is set up.
Send a request to the Perplexity API in Python, TypeScript, or cURL.
See per-model and per-tool pricing before you start.
Enter the email address on your organization's verified domain and click **Continue with SSO**. Use **Back to all options** if you need to return to the other sign-in methods.
You are redirected to your organization's identity provider. Complete the sign-in there — including any MFA prompts — and you are returned to the API Portal.
If you see **"SSO is not available for this email address"**, SSO has not been configured for your domain yet. Ask your organization admin to complete the setup steps below, or use one of the other sign-in options.
### Configuring SSO for Your Organization
SSO is configured once in your organization's Perplexity organization settings — not in the API Portal — and applies to sign-in across Perplexity, including the API Portal.
For more help setting up SSO on Perplexity Enterprise, visit the [Single Sign-On collection in the Perplexity Help Center](https://www.perplexity.ai/help-center/en/collections/16665790-single-sign-on).
Your organization must have an **active organization subscription** in the main Perplexity app. An active trial qualifies. If billing is not set up yet, the settings page shows **"Complete payment to begin setup"** instead of the enable button. There is no minimum seat count for SSO itself.
As an organization admin, go to [**Settings → Identity**](https://www.perplexity.ai/account/org/identity) in the main Perplexity app. You need the **Admin** role on the organization.
Add and verify at least one domain (for example, `yourcompany.com`) that your team uses for email. Verification is done through a DNS record.
Click **Begin setup** and follow the self-serve portal to connect your IdP. The portal supports SAML 2.0 and OIDC connections and walks you through your specific IdP. For more help, visit the [Single Sign-On collection in the Perplexity Help Center](https://www.perplexity.ai/help-center/en/collections/16665790-single-sign-on).
Make sure your organization has **API access** enabled so your SSO users can reach the API Portal after signing in. If members can sign in via SSO but cannot open the Portal, ask your org admin or [Sales](https://www.perplexity.ai/enterprise/contact-sales) to turn on API access for the organization.
Once the IdP is active, you can enable **SSO required** on any verified domain. When required, everyone signing in from that domain — including Google, Apple, and email attempts — is routed through your IdP.
Need help with SSO setup or want us to walk through it with you? Reach out to your Perplexity account team.
***
## Continue With Email
Email sign-in is passwordless. There is no password to set or remember.
Enter your email in the **Email** field and click **Continue with email**.
You receive an email with both a **magic link** and a **temporary sign-in code**. Use whichever is more convenient — clicking the link on the same device signs you in immediately, and the code works on any device.
Once verified, you are signed in. If this is your first visit, the setup wizard walks you through creating an API group.
If your email address is on a domain with **SSO required**, the email flow routes you to your organization's identity provider instead of sending a code.
***
## Switching Between Sign-In Methods
You can use different sign-in methods at different times with the same account. If you first signed up with email and later click **Continue with Google** using the same address, Google is linked to your existing Perplexity account — your API groups, keys, and billing stay in place. The same applies to Apple and to switching back to email.
Account linking is based on your **email address**. Signing in with a different email — for example, a personal Google address vs. your work email — creates a separate account with its own API groups and keys. If you end up with two accounts by accident, contact [api@perplexity.ai](mailto:api@perplexity.ai).
***
## Next Steps
Create your organization's workspace, add billing, and invite teammates.
Generate and manage keys once your API group is set up.
Send a request to the Perplexity API in Python, TypeScript, or cURL.
See per-model and per-tool pricing before you start.